If you’ve ever done guitar lessons on Zoom and had problems hearing the guitar, it’s probably because echo cancellation was turned on along with other audio enhancements (like noise suppression) that Zoom does. Here’s how to configure the audio settings on Zoom to work better for music lessons.
Bring up the Audio Settings Menu
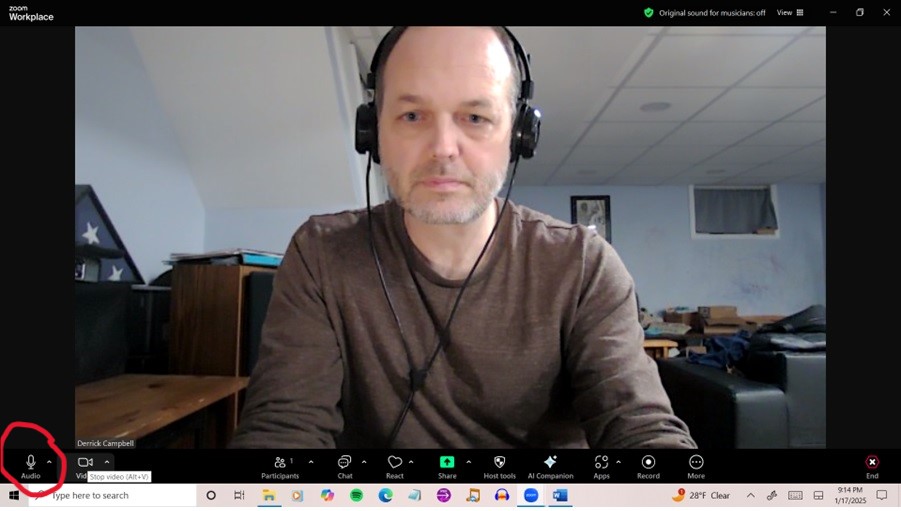
In the lower left part of the screen is a microphone icon with an up arrow “^” next to it. Click on that arrow.
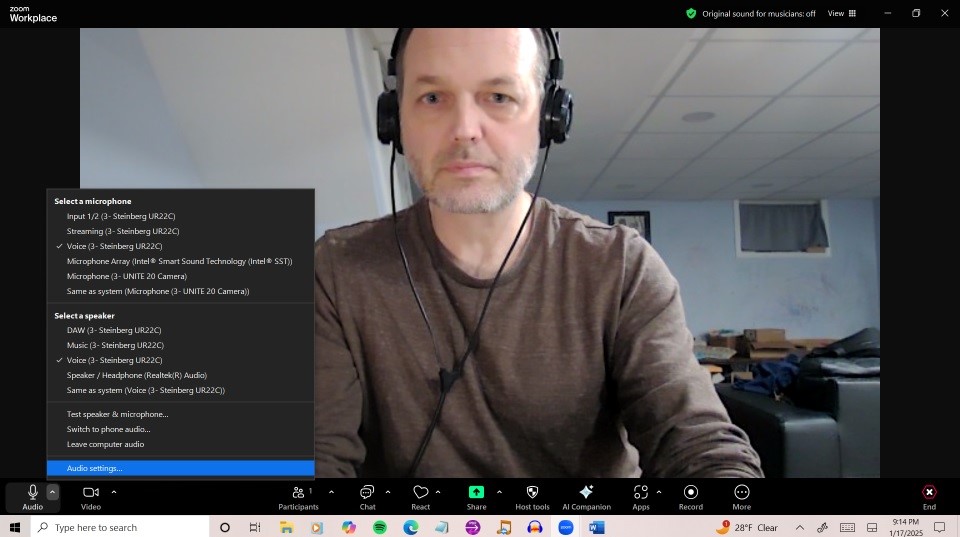
Clicking on that arrow will bring up a menu and you need to select the bottom item, “Audio Settings.”
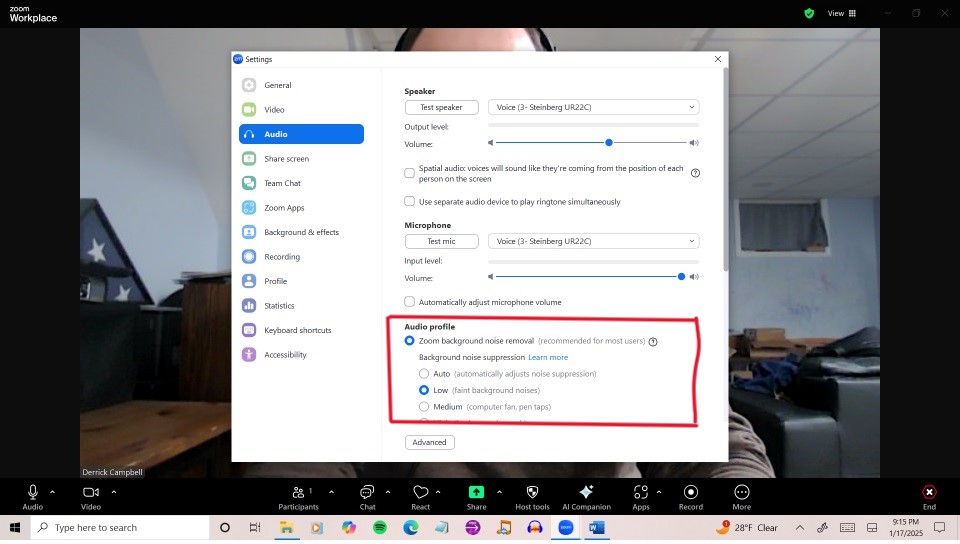
Clicking on that menu item will bring up a window with the audio settings. The first section is for setting up the speaker, the second is for microphone settings, and the third is entitled audio profile, which I circled in red in the picture below. This is the section you need to alter.
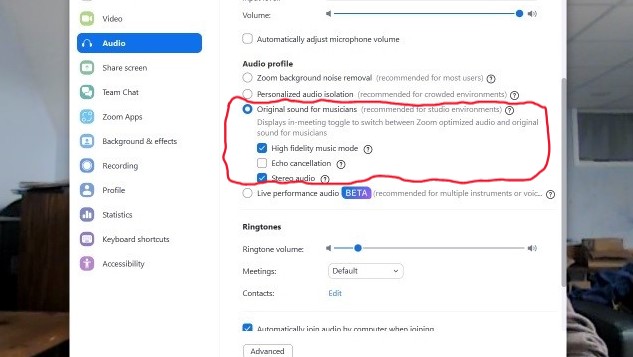
You might need to scroll down a bit to find the option to enable “original sound for musicians.” When you do this, make sure the selections “High fidelity music mode” and “Stereo audio” are checked, but “Echo cancellation” is not checked.
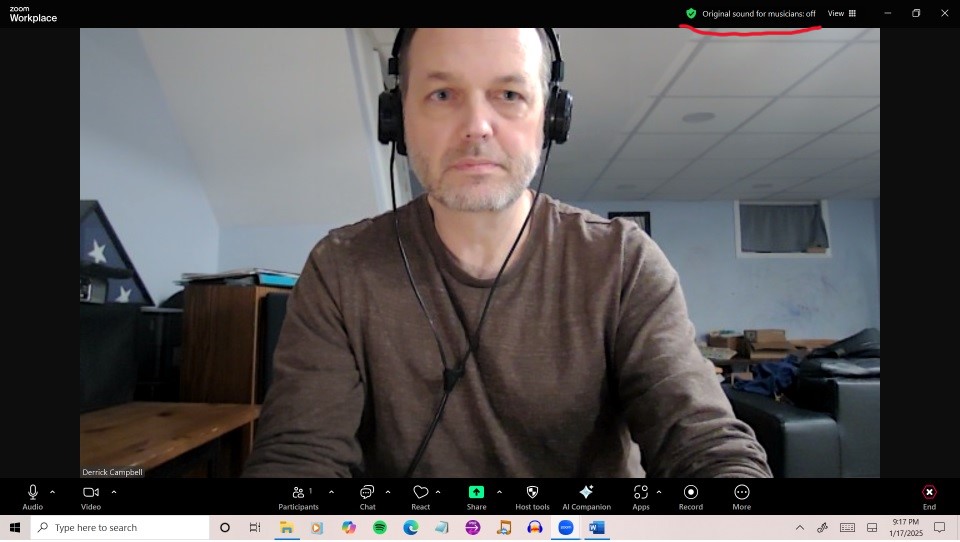
Once you have done this, close that window. You’re now back at the main video screen and now you want to find the option to turn on original sound, which is in the upper right part of this screen. I underlined it in red.
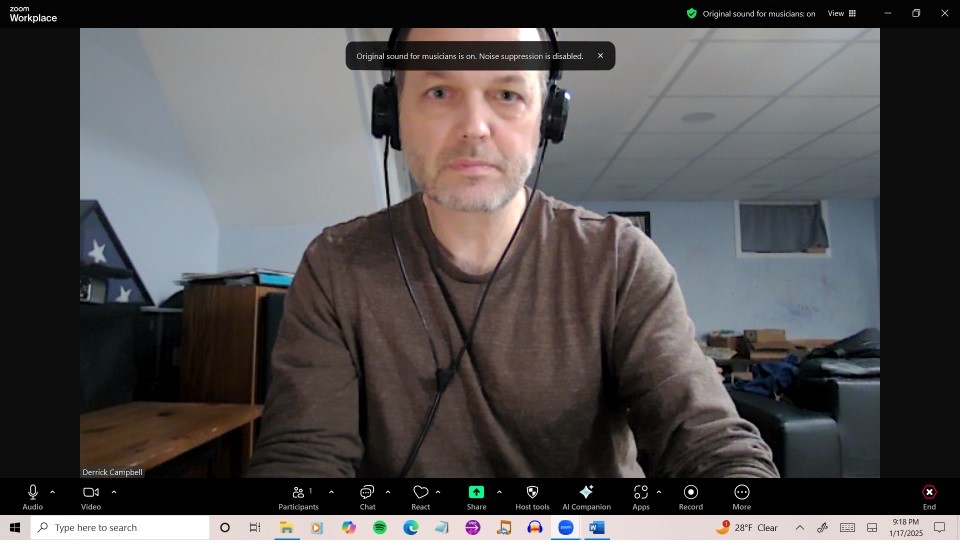
After you click on that option to turn on original sound, you should get the following message at the top of the screen in a black box – “Original sound for musicians is on. Noise suppression is disabled.”
Other audio tips
Using headphones will make the experience much better. You’ll be able to hear the instructor’s guitar more clearly and it will be easier to play along with what they are playing. Also, if you plug in your headphones or earbuds in the headphone jack of your laptop or iPad, it will not disable the microphone. You don’t need a set of earbuds with a built-in mic or audio interface for this, any headphones will work.